
Tuesday, February 28, 2012
I WON - Pink Paislee!!
Early February, I joined a blog hop with Pink Paislee and Epiphany Craft..They picked me from the Day 2 posts. Yipee! I just love Pink Paislee and Epiphany Craft. And, together they rock. Here is a picture of my winnings....so cool!
 Lots of Vintage and lots of Mist-A-Bles. Just my style. Can't wait to dig in. Color me Happy!
Sunday, February 26, 2012
Let's Scrap Blog Around the World Day 14
This is the last day for me on the Let's Scrap Leap Around the World Blog Hop....here are the last 5 of the 50 cards I made this month. Whew. This was a lot of fun and I'm going to miss going on the site everyday. So let's begin:
 Card 46 is made with glitter and stickers. On the flower sticker, you take off a section at a time and add the glitter from dark to light. So, I took off all the sections of the dark green first...then glittered that...next the brown, etc. You use double sided glue sheets and they are heavy duty so the glitter just shines. This technique uses little glitter, but you will have it all over you for a couple of days and all over your craft room for weeks. I just love this glitter and play with it as often as I can.
 Card 47 uses the same vinyl stickers as card 46, but this time I didn't glitter it in. I placed the sticker on a piece of acetate and filled in the back with alcohol ink. The papers and ribbon are from my stash.
 Card 48 uses scrap paper and a stamp from Outlines. Take a moment to check them out. I love their stamps and they are so original and clever in showing you how to use them...a lot of layering. Here I colored the hearts and flowers with alcohol ink. I made 3 stamps of the heart and layered it with pop dots. I added liquid glass in the center of the flowers and liquid pearls all over the heart.
 I make cards and send them to the troops through Mothers Cookies - a group of women that send out packages every single month. These cards go to the troops for their use. Something to write in and send home. I used sizzix dies to cut the flower and pocket, a Close To My Heart stamp for the stitching and a wood stamp I had for the sentiment. Stickles were used to add a little bling to the flowers.


My last card is a card I made for my mother. I used the masking technique. First I stamped the House Mouse onto the paper. Then I covered it with another image of the same stamp and cut out. Then I stamped the Close To My Heart band-aid all over the card...then filled in the spaces with another CTMH stamp. I used water color pencils to color the mice and hearts. I finished this card by using my black writer to write the words Get W....on the mouse's tail.
Friday, February 24, 2012
Alcohol Ink Tutorial
I was asked to put a tutorial together on Alcohol Inks. This is by no means a complete review of everything Alcohol Inks can do. It is a starter tutorial only. Supplies:
 Well the first thing on your supply list will be Alcohol Inks. These are Tim Holtz Ranger. You will also need their blending solution. The blending solution is the key to alcohol inks. It blends, lightens and removes the color from the alcohol inks. I also have a stamp with loop tape so the felt sticks to it. I cut the felt to fit the stamp. You will also see 4 x 4 sheets of glossy paper....this is not glossy photo paper but a clay coated paper. When I play, I cut my sheets 4 x 4 so I can see what spot I want to stamp. I'm using a piece of acetate and archival ink. Archival Ink is an oil base and won't smear on the alcohol inks. All of these supplies can be purchased at most craft supplies stores. I got all of my from Michael's using my 40% coupons. Cover your work surface with a craft mat. These inks do stain.
 Choose a couple of colors you want to start with....remember we are playing so there are no wrong choices. I chose latte and caramel. First the latte. I put 4 small dots on my felt. I held the nib of the alcohol ink for 2 seconds each...very fast.
 Next I added a few dots of caramel. Noticed I alternated the dots....think random.
 I then added some blending solution. The same random technique and the 2 second rule apply when adding the blending solution. Notice how the colors begin to blend together.
 Then dab...dab...dab all over the paper....notice how the you can see through the alcohol inks....pretty. Cover the entire paper. Have a pen handy and write on the back the colors you used so you have a sample the next time you want to stamp.
 Here I took the same two colors and held the stamp on my paper and swirled the stamp over and over...same colors...just different.
If your colors are two dark...just add more blending solution...if you want to add more color, just put some on your felt and dab away. You can also add blending solution directly to your paper. Try different colors.
 Here are four or five different colors with the blending solution already on my new felt. DAB...DAB...DAB
 Remember, if you want a lot of a certain color, add more dots of that color to your felt....if you want less of a color, add less dots. You can also stamp on acetate and many other mediums.
 Here I applied alcohol ink directly to a piece of acetate...I used the same felt that I used above and DAB...DAB...DAB
 The colors and blending solution that I already had on my felt helped to blend my colors on the acetate. Really, that's all there is to it. Dot...Dot...Dot...Dab...Dab...Dab
 I stamped an image on my papers and acetate. Archival ink takes awhile to dry so set it aside or use a heat tool to dry it faster. I let mine sit overnight only because I was tired and went to bed. When I use acetate, I sometimes cover it with tissue paper so you can't see the glue when you put your project together. Just paint Mod Podge all over the dried image and put your crumbled tissue paper over it....after it's dry, cut your tissue paper to match the size of your acetate.

You can use regular cardstock with alcohol inks. Because it's absorbent, it will take more ink to cover your paper. When you use regular cardstock, you can use regular dye base ink. Clean your work surface by spilling a little blending solution on your stains and wipe with a dry disposable cloth. If you get any stain on your clothes, the blending solution will take it off. Keep in mind that it is alcohol based and is flammable until it dries...15 - 20 minutes. Well, I hope you had some fun. If you have any questions, please email me at scrappinvall@yahoo.com. I'll be glad to answer any that I can. Tim Holtz also has a couple U-Tube videos that you can watch.


If your colors are two dark...just add more blending solution...if you want to add more color, just put some on your felt and dab away. You can also add blending solution directly to your paper. Try different colors.


You can use regular cardstock with alcohol inks. Because it's absorbent, it will take more ink to cover your paper. When you use regular cardstock, you can use regular dye base ink. Clean your work surface by spilling a little blending solution on your stains and wipe with a dry disposable cloth. If you get any stain on your clothes, the blending solution will take it off. Keep in mind that it is alcohol based and is flammable until it dries...15 - 20 minutes. Well, I hope you had some fun. If you have any questions, please email me at scrappinvall@yahoo.com. I'll be glad to answer any that I can. Tim Holtz also has a couple U-Tube videos that you can watch.
Wednesday, February 22, 2012
Let's Scrap Blog Around the World Day 13
Well I have been asked to go over step by step the use of alcohol inks so tomorrow I will be spending the day playing to come up with some good pictures. Today, is all about the Let's Scrap Leap Around the World Blog and I have 5 more cards to post.
 I turned sketch 41 on it's side and decided that the layering looked like steps so I made this three step card from a 5 1/4" x 10 1/2" piece of double sided cardstock. I first scored 3/4" on each of the long sides then I turned my paper and scored at 2 5/8", 5 1/4", 7", 8 5/8" and 9 1/2". I took my x-acto knife and cut on the 3/4" scoreline from the 2 5/8" score to the 9 1/2" score line and did my valley and mountain folds. The stamp and the sentiment are CTMH and the flowers are from Heartfelt Creations. I stamped them in 3 colors to match my paper, cut them out and cupped the petals using my 8 mm McGill stylus. Then I pop-dotted them to the steps of the card. My flower lady was colored with copic markers to match the paper.
 The hardest part about this sketch was the measurement of each piece. I visualized this 6" x 6" card in quarters, then started with the 1" x 3" piece in the lower right hand side and worked from there. I used all pink scraps. One - the sketch was in pink and Two - pink is my favorite color. After I figured out all the dimensions, I reduced them by 1/16" on each side so you could see the black. The sentiment is another CTMH stamp.
 Card 43 I made the day I was playing with my Ranger alcohol inks. This is caramel and latte on plain white cardstock. It really uses a lot of ink. The stamp and sentiment are mounted wood block stamps and I'm no longer sure where I got them. The flourish is a sizzix die. The bottle layer piece is pop-dotted.
 This card uses Close To My Heart paper and stamps. Well the girl and the hearts are CTMH. The sentiment is a block stamp. I used 3 heart eyelets to complete the simple detail.

 I turned sketch 45 into a waterfall card. You pull the ribbon at the bottom down and the scallops flip up and slide under the horizontal strip until you see the last sentiment. This was fun to make. Later this week, I will give you all the details and add some additional pictures so you can make this card yourself. For basics, it is a 5 1/2" x 4 1/4" card. I used my marvy scalloped punch and oval punch to make the 4 sentiments. The CTMH ribbon is tied at the bottom and I used an extra circle to reinforce the paper.
Well I have 5 cards left before the end of the month. It's been fun making so many cards and my house has suffered. I'll be glad to get back to scrapbooking.


Well I have 5 cards left before the end of the month. It's been fun making so many cards and my house has suffered. I'll be glad to get back to scrapbooking.
Tuesday, February 21, 2012
Let's Scrap 2-15-12

Monday, February 20, 2012
Let's Scrap Blog Around the World Day 12
This weekend was a busy one. Saturday I spent the day cropping with friends. Sunday we all went to the Riverside County Date Festival in Indio. We had fun on all the rides and fair food is always good. Well, I added 4 more cards for you to review.
 In card 37 I used another one of my Penny Black stamps. Mimi is sooo cute in her green outfit...like any girl, it's all about the shoes and Close to My Heart had the perfect stamp for shoes and sentiment. The papers are DCWV. Mimi's hat is 100 Black. The reds are R24 and 27. Her hair is YR21, E30, 33 and 35. For her skin, I used E000, 00, 11 and R20. Her dress is G00 and G02. I penned the floor and her shadow is C1. As always, coloring Mimi puts me in a happy mood.
 Card 38 was another fun card to make because I got to play with my alcohol inks. I used caramel with my blender ink on my stamp pad and just bounced my way around a piece of shinny cardstock. Then stamped with one of my mounted stamps. Thinking of You is another mounted stamp and the sentiment is raised with pop-dots. The papers are all scraps.
 Again, card 39 uses paper from my scrap bin. The stamps are mounted. I'm not sure where I got my mounted stamps....I bought them quite awhile ago. I rounded the corners of the card to soften the edges and added 3 pearls as shown on the sketch. I colored the leaves with copics YG11,17.
 The sketch for card 40 used eyelets. But, to tell you the truth, I forgot how to set eyelets in the middle of the page. I've used my crop-a-dile for so long now and they can only be set so far in.... I used a CTMH stamp for the faux stitching and sentiment. My stamp was longer than the area I needed to stamp, so I masked each side so the stamp would be just where I wanted it. Instead of eyelets, I used buttons. Most of them are black, but the center and 4 corners are navy blue.
Only 10 more cards to post and then I'm done.....whew 50 cards in 29 days....needless to say, I'll have my cards completed for the whole year.


Only 10 more cards to post and then I'm done.....whew 50 cards in 29 days....needless to say, I'll have my cards completed for the whole year.
Thursday, February 16, 2012
Let's Scrap Blog Around the World Day 11
Well another day another card...or should I say cards. I was up late last night and early this morning making cards. I'm really having a lot of fun following the blogs and making cards from the sketches.
 This was a fun stamp to color. I used scrap paper. The Love stamp is from Oulines. I love their stamps. I used copic markers YG11, 17; V12, 15, 17 and R 81, 83 and 85. I used liquid glass to color in the flower to make it shine.
 When I was putting my scraps on my card it looked like a layer cake so I made it a cake and added the appropriate stamp. The stamp is CTMH.
 Card 33 uses CTMH papers and some scraps from K & Co. I used a circle cutter and pop-dotted the butterfly.
 Card 34 uses the same CTMH papers as 33. This is just layering all the different papers. The center post card paper is from my scraps.
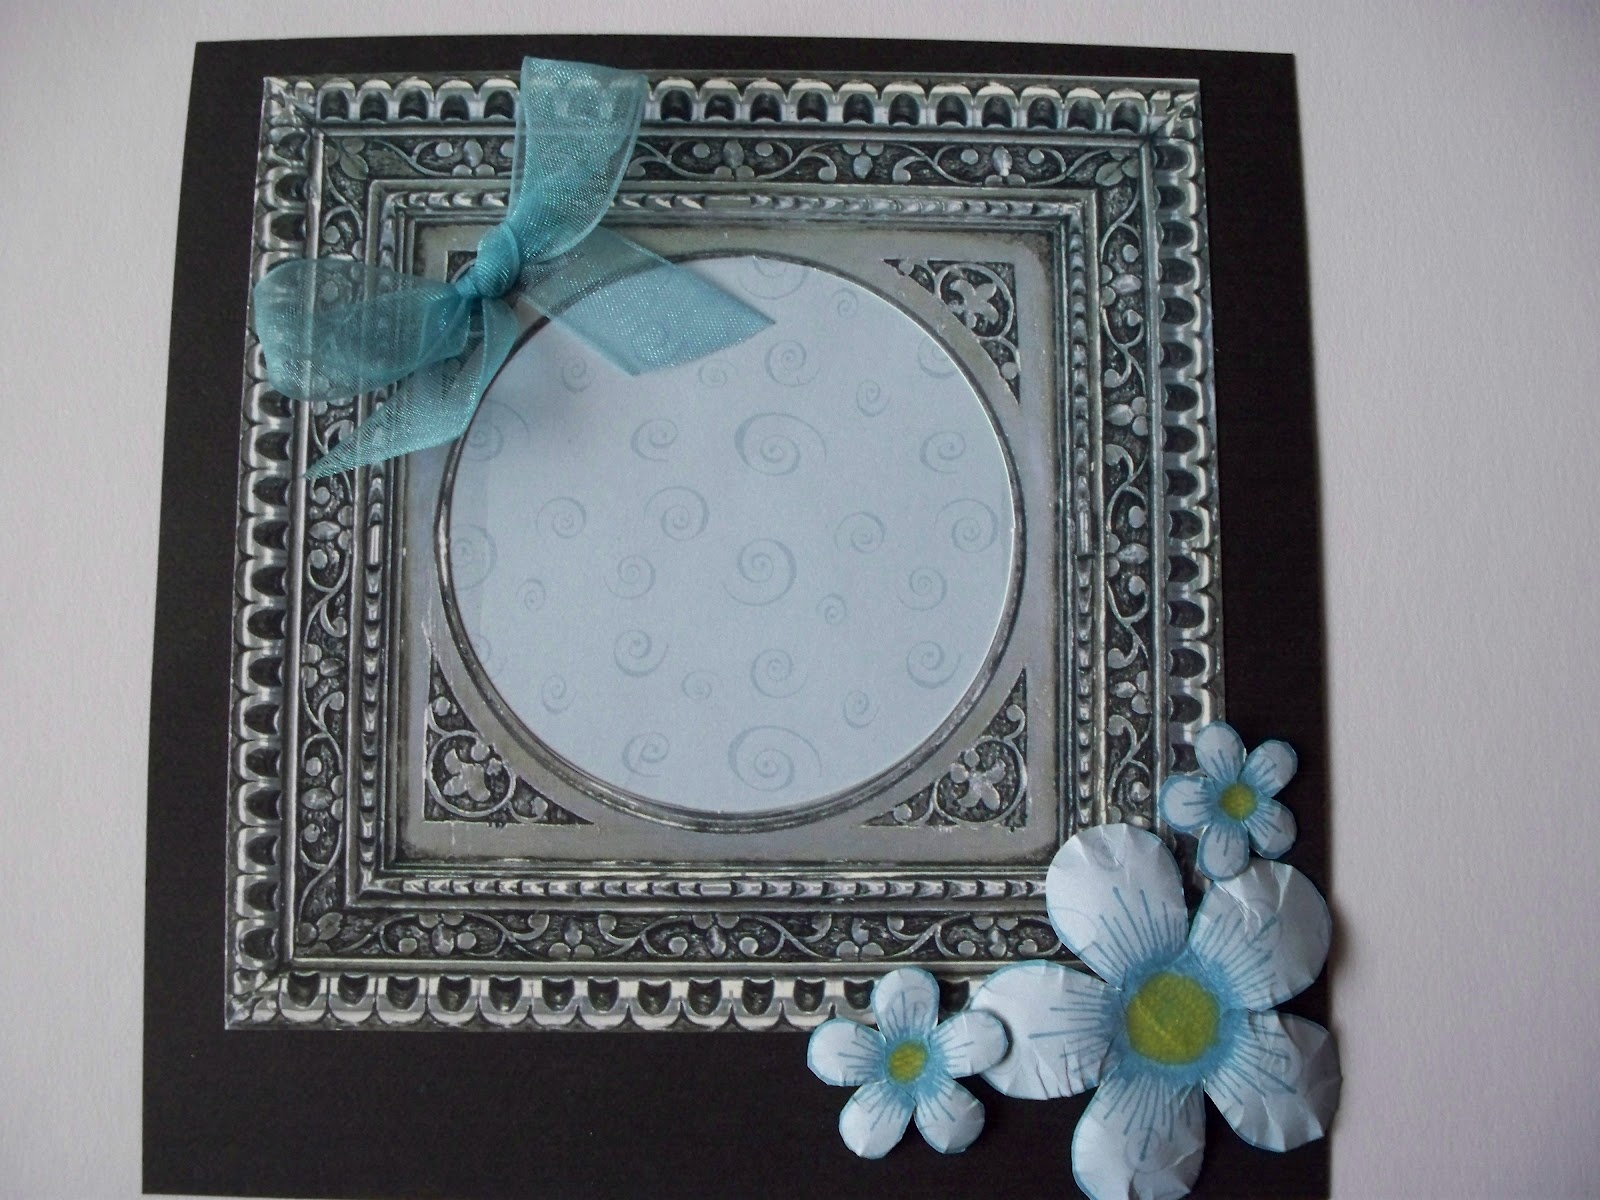
 I bought this frame set from QVC a few years ago. They were supposed to be for my scrapbook, but I found them to be to ornate. I think they work perfectly for cards. The ribbon is CTMH and I made the flowers using a stamp set from Heartfelt Creations. If you have some time, please visit their site. They have wonderful stamps and dies to match. After I stamped the image, I cut them out and used my McGill 8mm stylus to cup the petals.
 The last card today is for my grand daughters birthday. I used the CTMH Art Philosophy Cricut cartridge to cut the banner and my circle cutter to cut the circles. I found the tag in my stash of Tag-lets (also from QVC many moons ago). The Happy Birthday is a rub on and the '10' is a sticker. I love these happy colors and I think she will too.


Subscribe to:
Posts (Atom)