Showing posts with label Close To My Heart. Show all posts

Saturday, February 25, 2017

2017 February Session 2 Male Card Class

This week we had about 45 wonderful ladies in our Thursday and Friday classes.  We are having so much fun sharing with all our friends.  The more the merrier!  Wine was served in both classes as well as a lot of goodies!  You are always welcome to bring something to share!

If you are new to our groups, please bring a pair of good sharp paper scissors and either a good liquid glue like Tombow in the green dual tip container or a good tape runner.  Actually both will work at different times.  That's all you need to start.  As you progress, you might want to add 3-D Foam Tape, glue dots and a lot of bling!

I will be addressing the two cards I did this session.  Products can be purchased on my CTMH site. 

 scrappinvall.closetomyheart.com


My first card started with a black card base. Take a 8.5 x 11 sheet of paper and cut it in half on the long side.  Fold in half to make an A2 standard size card 4.25 x 5.5.    The option for this card was to antique or distress all the pieces with black ink. The black print mat is 4 x 5.25.  I then added a grey dot strip of paper 5.25 x 1.75 about 1 inch from the left side of the black print mat.  Both of these papers were from older Close to my Heart Paper options.

Next assemble the sentiment tab.  I first cut White Daisy Cardstock 2 x 2.  I chose one of the 5 stamps from B1537 Birthday Sparkles as my sentiment.  I layered that on a 2.5 x 2.5 black sparkle paper.  Then layered that on a 2 5/8 x 2 5/8 black cardstock.  This only leaves 1/8" of black all around the black sparkle, but I just wanted a touch of black here.

Before I put that on my card, I used 3-D Foam Tape to raise it up and give in added dimension.  I finished the front by adding 3 black sparkles on the lower right corner of the card.

On the inside, I cut a 4 x 5.25 piece of White Daisy Cardstock, stamped it with the sentiment CTMH A1201 One in a Million


The inspiration for the second card came from a stamp that I originally wanted to use of a vintage truck.  Thinking about supplying 30 women with color pencils or watercolors to color the truck during class moved me in another direction.  Read on!!!

The second card I did stared with a cream base.  I chose cream for the base of the card because in California, most people will buy a light colored card to reflect the heat of the sun.  Again I used a 8.5 x 11 sheet of paper and cut it in half on the long side.  Fold in half to make an A2 standard size card 4.25 x 5.5.  The options for this card was to use a corner round on all the pieces and/or use brown ink to distress all the edges.  The corner rounder reminded me of the curve of the fenders on a car and the inspiration for to distress came from the hint of dirt the car gets from driving down the road. The brown wood print mat is 4 x 5.25.  This reminds me of the wood inlay both in and outside of the vehicle.  I set this aside to assemble my embellishments.


Assemble embellishments:  First attach the 2.75 x 3.5 brown leaf print to the 3 x 3.75 cream mat.  Attach to card base, leaving 1.4" at the bottom of the brown wood mat.  Next attach the cream 2.75 x 1.75 diamond plate embossed piece to the 3 x 2 brown print paper.  Use 3-D foam tape behind this and set it on an angle in the upper left corner of the card. (See card for placement).

Take the 3 x 1.25 blue print piece (I picked blue print because when you ask a man his favorite color, 9 times out of 10 they will pick blue)  and attach to 3.25 x 2 cream mat.  Place 3-D foam tape to the right side and top only and place on an angle on the upper right side of the card crossing over the left embellishment.  The reason you only put 3-D foam tape on the right side is because the left side is place on the left embellishment which already has 3-D foam tape on it.

To finish off these two embellishments, I attached used CTMH Chocolate Ink to stamp a "mud flap" and used 3-D foam tape to secure it to the left side of the left embellishment.  I also used an older Embossed Metal Badge Button from CTMH to represent the tire and hub cap of the car.

The last embellishment is the sentiment.  I chose Make a Wish from my stamp drawer and stamped a 3.25 oval I cut using the Art Philosophy Cricut Cartridge.  I placed my stamped oval on a 3.5 brown print scalloped oval also cut using the Art Philosophy Cricut Cartridge.  Before placing it on the card, I took a 3.25 piece of brown ribbon (representing tying a man to his car), folded in half and stapled it to the oval sentiment.  I chose a staple to represent the metal of the car.  I trimmed the ribbon and using 3-D foam tape, attached it over the bottom edge of the 2 embellishments already placed on the car.
A1201 One in a Million
B1537 Birthday Sparkles
I hope you like these.  Please comment and let me know what you think!


Wednesday, November 9, 2016

Christmas in November

Well last week I did a Christmas class with a friend of mine.  I had so much fun.  We each did 5 cards and had lunch in the middle.  Here are my cards.  I'll come back later to post some directions in case you want to make them.  Right now I'm suppose to be packing to attend a Copic Class in Arizona


Taught stamping off and 2nd generation stamping.  Also taught paper flower sculpturing using the new Close to My Heart Poinsettia  Stamp....sooooo cute!  Oh the Red Bird card was made using the Art Philosophy cartridge from Close to My Heart....well anytime I need a circle or scallop I use that cartridge.

Saturday, September 17, 2016

Just joined Close to my Heart AGAIN

Hi everyone!  Just wanted you to know that I just joined Close to my Heart again...  Here is my website:   scrappinvall.closetomyheart.com   

You probably know that last year I was gone for 5 months from August through part of December.  My sister had been fighting the Big C word for several years and she was the primary care taker of my mom back in Illinois.  Well she got pretty weak and I traveled to Illinois to take care of mom.  Both my mom and sister passed in November...cry time!

Well anyway, during that time, I didn't even think about my crafting, scrapbooking  or card making.  Not placing regular orders with CTMH, caused me the lose of my status.  So I had to rejoin.  Not a bad thing mind you since the kit only cost $75 and you get $200 worth of product AND you get to pick $50 of stamps and ink that you want.  So that means you really only join or $25...not a bad deal if I say so myself.

See you get a medium size storage case...blocks...scissors...glue...foam tape...stamp cleaner and scrubber....stamp perks....all kinds of business supplies including catalogs....plus again don't forget about that $50 in credit that I will need to spend TODAY!  I really love Close to my Heart!

Well I better start building my business yet again from the ground up....let's party!

Saturday, April 18, 2015

Solera Paper Crafters January 22 Class

Well I decided to play catch up for those that have purchased scrapbook or card kits from me.  I always put directions in my kits, but I thought that if you wanted to make additional cards at home with your own paper, you could certainly do that just by looking at the finished cards or scrapbook pages.

Here is the finished card that I taught at the Solera Papercrafter Group on January 22.  WOW I did say catch up didn't I.

Well this group is in a 55 and older community.  Some of us have limited income so I decided to give them templates for folded cards.  That way they can continue to make additional cards at home.

This first card is called Double Dutch Fold.  You can find several examples on You Tube, but some of the papercrafters in the group do not do computer.

Here is the finished card!


I used an Anna Griffin Lace Die and Tim Holtz Tattered Rose die cuts.  The individual flower pieces were distressed using Daisy White Close to my Heart Ink.  And the 3-D effect of the flower was achieved by using the McGill Paper Blossom Molding Mat and either the 5MM or 6 MM Molding Tool.  After all the individual flowers are molded, they are placed on top of each other making sure you off set each petal.  The final step was to place a gem in the middle of the flower.

This fold is called Double Dutch because you have a fold coming down from the top and also two folds coming from either side.  The top fold meets the two center folds.  

I think it really turned out pretty good.  We are sold out of this kit!

Saturday, July 12, 2014

Solera Papercrafters July 10 Workshop

Well it's that time again.  Actually, it's been that time but I've been super busy.  Every 2nd and 4th Thursday of the month, Patty and I get together and teach card making and scrapbooking to our fellow artists here at the Solera Community where we live.  It's fun teaching and I love to share, so I'm going to show you all what we did this last week.  On the 2nd Thursday of the month, I make 1 card and a 2-page scrapbook layout.  Patty does two cards.  My Scrapbookers come 1/2 hour earlier to complete their pages and Patty teaches the first card.  Then as soon as my Scrapbookers complete their layouts, they go over and finish making the first card.

Here are the layouts I did this week.

I found these incredible layouts on sale and picked them up for my Scrapbookers to complete.  We only charge $6.00 for the two pages, so they have to be pretty simple.  These particular layouts come completely cut and ready to go.  Just add glue, decide what embellishments you wish to pop-dot, antique your items and add photo mats. Walla!  Done.  The base page is grey with large white circles.  There is a 10 x 10 star paper centered in the middle.  A 10" x 1/2" striped paper is added across the bottom of the star paper.  Grey/White bakers twine is added to the red tag which is pop-dotted on the left.  The grey and white star is glued to the tag then pop-dotted to the page in the spot that does not go over the photo mat.  That allows room for the picture to be added.  The date banner is also pop-dotted under the 4 x 6 photo mat.  White paper was glued under the thick telephone dial which already came printed with the sentiment.  Three gems were added to the upper left corner and 1 gem was added to the "O" in the word Shot on the banner.


The base on the right side of the 2-page layout used the same grey paper with white dots.  Red bakers twine is added to the navy blue tag and glued to the top of the page.  The sentiment was first glued to the blue and white star, then both were pop-dotted to the page with the star resting on the blue tag.  Another 9" x 1/2" striped paper was added under the sentiment.  A 8 1/2" x 1/2" star stripe was added under the striped paper.  Then we added the 3 photo mats.  Blue/white bakers twine was added to the peach tag and yellow/white bakers twine was added to the green tag.  Both tags are pre-printed with the sentiments and star.  The blue banner is pop dotted over the tags.  The red/white star is placed in the center of the blue banner.  3 gems are added to the blue banner and another 3 gems were added just above the 4 x 6 photo mat.  The red arrow was placed targeting the words on the tag.  All the pieces in both layouts were inked around the edges with light blue ink.  All in all, these layouts are pretty darn cute.


The inspiration from the card I chose to do came from Pinterest.  Then I went to my scraps and paper stash to pick the pattern paper and color card stock I used here.  Some of the paper is Close to My Heart.  Some is SEI and My Mind's Eye.


 Working from the base, I chose a Robin Egg blue cardstock 81/2 x 11 and cut it in half.  The yellow base is 4 x 5 1/4.  I then trimmed red cardstock to 10 pieces of 1 1/4 x 1 1/4 square.  I corner rounded the 2 opposite edges of each piece.  I then chose 10 different pattern pieces of scrap paper and trimmed those to 1 1/8 x 1 1/8 and again corner rounded the 2 opposite edges.  Close to My Heart Star Spangled Blue Ink was used for the sentiment stamped on Close to My Heart white 2 3/8 x 1 1/8 piece of paper which is mounted on a 2 1/2 x 1 1/4 piece of red cardstock.  Last but not lease, I threaded blue and white bakers twine through a green button and tied a bow.  Then used a glue dot to adhered to one of the puzzle pieces.  It took me awhile to choose the color layout so the yellows, blues, greens and reds were distributed through out the card. But I love the final look.  My students had a choice of a green, blue or yellow button since I encourage them to make their own layout.

Friday, February 14, 2014

Solera Papercrafters 02/13/2014

Wow have I really been away that long....I better just get my act together and sit down more often to share.  This week we had our Solera Papercrafters Group Valentine's Party.  Everyone brought a little something to share and Patty and I taught our cards and scrapbook pages.  We live in a retirement community and charge only $6.00 for a 3 card class.  If the girls want to do the scrapbooking pages, they pay an additional $3.00.  If they don't do the cards but just the scrapbook pages they pay $6.00 total.  So you see, we keep it pretty simple.  I found some great paper and die cuts from My Mind's Eye and put together this 2 page layout.


This page was created for 3 pictures to be placed in the center.  The oval tag with the heart will be placed between two of the pictures and is pop dotted.  The embellishment in the lower right is also pop dotted.


This page will hold 1 4 x 6 picture and 2 4 x 5 pictures.  The 3 embellishments here are all pop dotted.  Not bad for just $3.00.

It was my turn to do one card this week.  I found my inspiration on Pinterest.  I used all Close to My Heart paper.  A Martha Stewart punch for the black lace.  Cheery Lynn nested dies for the scalloped circle and regular circles.  Close to My Heart Art Philosophy Cricut cartridge to make the daisy. Darci embossing folder for the white lace. Close to My Heart stamp for the sentiment and a Candi embellishment for the center of the daisy.  The faux stitching on the daisy was created using Close to My Heart pen .05.  The Candi embellishment is pop dotted on the daisy and the scalloped circle is pop dotted on the card.


Tuesday, October 15, 2013

Cherry Tree Shoppe Class 09/28/13

Well, one of my girlfriends just called and wants me to teach a class at her home....she wants me to do the cards that I did at the Cherry Tree Shoppe in Beaumont.  So I thought that it would be a good time to post them here while I'm still thinking about them.


Witch at Spa card – Black base card size is A2.  Take 8 ½ x 5 ½ and score at 4 ¼.  Fold card.  Antique White web 4 x 5 ¼ paper with black ink and adhere to card base.  Stamp image on white 4 x 3 ¼ piece of white cardstock and color using markers.  Copics I used are:
                Broom E 35, E37, G14
                Stockings and Bubbles  YR16, V06
                Face E21, YG13
                Stars Y08
                Hair E30, E33, E35, E37
                Hat 100, YR16, V06
                Boots G14, Y21, Y17
                Cauldron 100, C1, C3, C5
Antique Edges of white cardstock with Grey.  Adhere to black 4 ¼ x 3 ½ cardstock.  Adhere layer card to card base.  The stamp is from Impression Obsession called Spa Day and the inks I used to stamp and antique are Close To My Heart.


Ice Cream Cone Card – Black base card size is A2. Take 8 ½ x 5 ½ and score at 4 ¼.  Fold card. Stamp image on white 2 x 4 ½ piece of white cardstock and color using markers.   Copics I used are:
                                                                Cone E53, YR21, Y21 and Y32
                                                                Sprinkles YG07, V04, Y38
                                                                Face W1
                                                                Wavy part W0
                                                                Background C1, 0
When coloring is complete, distress outer edge of white cardstock.  Distress pattern 2 ½ x 5 paper.  Adhere stamped image to pattern paper.  Set aside.  Distress 4 x 5 ¼ purple stripe.  If desired, antique with purple or black.  Adhere ribbon to lower half of purple stripe paper.  Adhere stamped image to purple stripe.  Adhere washi tape to bakers twine.  Adhere to purple stripe.  Adhere layer card to card base.   Attach owl.  This stamp is also Impression Obsession.  Distressing Toll and Inks are Close To My Heart.


Double easel Die Cut Beware Card – Start with a 6 x 12 black base and on the 12” side, score at 6” and 3”.  Fold to create base of card.  Cut orange pattern piece at 5 ¾ x 6 and adhere to 3” base fold.  Lay card flat and adhere ghost in window, bats and spider web.  Take 5 ¾ x 4 ½ pattern orange and on the 4 ½” side, score at 1 ½ and 3.  Fold to make easel.  Repeat with second pattern orange piece.  Adhere to card base.  Cut 7” x 2 ½ grave piece to fit and attach to second easel.  Adhere two ghosts at graves.   Attach black pumpkin to left side of first easel.  Adhere the words BEWARE to front base of easel.  Size tree to front easel to make sure card will close without bending the tree.  You might have to cut ¼ “ off the bottom of the trees.  Attach first tree to front of easel.  Add pop dots to left side of second tree and adhere to first tree making sure to offset.  Adhere ghosts though-out the tree.  Adhere skeleton to front of first easel at base of tree. The Web, Window, Pumpkin, Skelaton and Beware are cut from Cricut October 31 cartridge.  The bats, graveyard, tiny ghosts and tree are Memory Box Dies.  The ghost in the window is a Sizzix die.

If you have any questions concerning any of these cards, just send me an email and I'll explain a little more. 

Sunday, October 13, 2013

Sisterhood of the Traveling Scrapbookers and Cardmakers 10/10 class

Well it was time to put Scrapbooking back in the mix since I haven't done it in awhile.  So, I found some great paper on sale from My Mind's Eye and decided to make a Halloween 2 page layout for the group.


What I wanted to do here was to teach the group how to match pattern paper.  So, this one is really busy.  I really like how it turned out.  All the paper is My Mind's Eye.  It's not a brand that I use much, but it was a great sale and I couldn't pass it up.

The diecuts were cut using Cricut Craft Room FREE Theresa Collins Image of the Week.  I actually cut a bat border and a skull border.  And, I cut enough for the people who confirmed....then I got another email from someone who wanted to join us and I couldn't say no....so, I revamped the page and cut the borders apart.  It actually worked out better to cut them apart.  After backing the purple "Spooky" Title with black, we used a white gel pen to ink faux stitching on the black and the Close To My Heart black liner pen to pin faux stitching around the "ticket".

I used the Graphic45 Steampunk stamp Something Wicked This Way Comes to stamp in the oval cut from a Sizzix die.  Ye,s I still use my Sizzix even after I purchased my Cricut and Silhouette.  I can't seem to part with it.  But, I know that day is coming.  I also used the flourish stamp in the Close To My Heart Stamp set C1466 Instant Memories to stamp on the skull.  The photo mats are cut 4.5 x 6.4 to allow a border around the pictures.  I also showed them how to cut photo corners out of a 2 x 2 piece of black cardstock.

The diecuts are all pop dotted and really that's it. Patty (my cohort in crime) get to split the $6.00 we collect from each student to teach this group, we really love the friends we made here and try our best to come up with fun ideas.  I get another $3.00 from those that wish to take the scrapbook section of the class.  By shopping the internet for great deals, I was able to pull this 2 page layout off for only $3.00 plus shipping.  I still have a lot of paper left over and will be able to make quite a few cards for the troops.
This was my week to make 1 card/project for the group plus the 2 page layout.  I purchased the Close To My Heart Clear Treat Tubes (6 tubes with lids 4 3/4 x 1 for $5.95).  During Shop Hop, I was able to find some SRM Halloween stickers.  If you haven't used these, you are missing out.  You get enough stickers on the sheet to make 12 of the same projects.  The Happy Halloween and Candy Corn came on one sheet, and I also purchased a second sheet of borders, which I cut in half to put around the bottom of the tube.  So to complete this project, I first used the Close To My Heart 2" Scallop punch and some orange pattern scrap paper.  I then used the Close To My Heart 1 1/4" circle punch which matched the candy corn sticker with the circle exactly!!!!!  I then cut a purple piece of scrap paper and attached the Happy Halloween sticker.  The cat came from my stash.  A few years ago I purchased these diecuts (12 to a page)...not sure where they came from but the diecuts were 2 each of 6 different images. Cats, ghosts, scarecrows, pumpkins, monsters and can't remember the last one...anyway, these have slits in them to put in quarters....they were suppose to be used as Halloween treats instead of candy.   I let the group pick out which die cut they wanted.  I also let them pick out which border they wanted to wrap around the bottom of the tube.  We punched a small hole in each of the three elements we chose.  We wrapped Halloween black, white and orange bakers twine 3 times around the tube, tied a knot, attached our 3 elements and then tied a bow.  I brought a large container of M & M's and each person filled their tube....another project completed for less than $3.00 each.  It was another great class and everyone enjoyed themselves.

Tuesday, May 7, 2013

Cherry Tree Shoppe

Once a month I teach at the Cherry Tree Shoppe in Cherry Valley, CA.  I love the ladies that come and share with me.  I try to teach 4 projects a month.  This month was a huge success.  Wait till you see what I did!  I can't decide which card I like best.

My first card is a 6 x 12 base card folded in half.  I used Close to My Heart papers as they are double sided heavy cardstock quality.  I first set a triangle piece of paper in the upper left hand corner for the base.  I then added 1/8 piece of a 10"doily.  The red print paper is Close to My Heart which I folded...it's a gentle fold...not all the way down.  I put a couple pop dots under the fold to keep it rounded.  I used a Close to My Heart pearl as an added embellishment.  The banner was cut from Close to My Heart Cricut cartridge Art Philosophy antiqued and stamped in Pear ink from CTMH.  The flower punches are 4 different sizes of Carl's punches and I used a copic pen to outline each petal.  The leaves were punched from EK Success and Punch a Bunch punches.   Each flower was rolled and shaped using the McGill stylist and soft mat, then assembled.  In the center of each flower, I placed a Starform sticker dot.  While I was teaching this class, I decided to add faux stitching in white around the edges of the red printed paper.  (The stitching is not shown in this picture)

In the next card, I wanted to teach the blending and masking techniques.  The base card is a red Core'dinations Pearl paper 8 1/2 x 5 1/2 folded in half.  I added a white background piece of paper.  Then we placed a 1 1/4 round mask on a glossy piece of paper to represent the moon.  Then going from light to dark, I blended CTMH Buttercup, Honey, Sorbet, Sunset and Hollyhock inks using a soft sponge.  The birds flying are stamped in Hollyhock using a Stampscapes stamp and the feather stamp is from Stampers Anonymous....I remember buying it from Tim Holtz before he was really big.  It's hard to see in this picture, but I also stamped Dream in the lower right hand corner again using Hollyhock ink.

My third card is a tri-fold card.  I used all Close to My Heart paper, inks and stamps.   Start with a card base of 5 ½ x 12”  On the 12” side, Score at 2”, 4”, 8”, 10”.  Turn cardstock to the       5 ½" side and position it in the trimmer at the 1 ½ mark.  Cut from the 2” score line to the 10” score line.  Turn paper over and make the same cut on the other side.  Fold the first score line as a mountain, alternate valley and mountain folds at the 4” and 8” score lines. The CTMH Chantilly paper is double sided and both sides of the paper was used here, double matted using Twilight cardstock and antiqued using Twilight ink.  The Cotton Candy pink flower, Buttercup yellow flower and Happy Birthday banner were first cut using the CTMH Cricut Art Philosophy cartridge then stamped.   The Cotton Candy pink flower and Twilight Butterfly were stamped first then cut to shape.  A CTMH sentiment was stamped in the center panel.  The pink ribbon was attached to the double mat prior to be glued in place.  A Craft works CANDi dot was pop dotted in the center of the daisy.  The daisy, Happy Birthday sentiment and butterfly were pop dotted in place.

My last card is a center step card.   Start with a card base of 5 ¾ x 11.  Place the long side in the trimmer at the 1” mark and cut from 1” – 6.5”.  Turn over and cut the other side the same way.  Placing the 11” side on the scoreboard  score from the edge of the paper to the cut line at the 1”, 2” and 6.5” marks.  Turn over and do the same on the other side.  Then score between the 2 cuts at the 5.5” mark.  I used paper from my stash for the side panels and center panel.  The center panel is embossed using my sizzix big shot and a cuttlebug folder.  I used the Everyday Paper Dolls Cricut cartridge to make the girls, hair, clothes, hat and sunglasses.  I used the Beep Beep Cricut cartridge to make the car.  To finish it off, I used a red and white gel pen for their mouths and the white gel pen for the tire treads.  I used perfect pearls for their necklaces, bracelets and earrings.  The card sentiment was typed in my computer and cut to size.  The car and girls are pop dotted for an added dimension.  
 
I sure hope you like these cards.  Leave me a comment and join my blog.  Thanks for looking.

Monday, May 6, 2013

Mothers Day Card

Just wanted to share the Mother's Day card I made this morning.  I was sitting here thinking of all the things she use to tell me when I was a kid...it filled 2 pages.  I picked out some of them and made the larger background tag.  I used Close to My Heart papers and sentiment stamp, a digi stamp 4 Joy image, and an SEI embroidered rosette.  The digi Stamp 4 Joy image is colored with watercolor pencils and pop dotted with 3D Foam Squares.  I used EZ Runner Double sided adhesive to attach everything.  The faux stitching was done with an .05 CTMH pen. The card size if 5.5 by 8.5.  Let me know what you think and please follow my blog.  I will be entering a couple of contests with this one.  
Here is the link to the Digistamps4joy challenge:
http://digistamps4joy-sa.blogspot.com/2013/05/challenge-66-women-are-special.html
Mojo Monday challenge:
http://mojomonday.blogspot.com/
For the Ladies challenge:
http://kaboodledoodles.blogspot.com/2013/05/challenge-170-for-ladies.html
Love To Scrap challenge:
http://lovetoscrapchallengeblog.blogspot.com/2013/05/challenge-5-anything-goes.html

Sunday, April 28, 2013

Your Scrapbook Place Contest

I was reading my emails and came upon a link to this site from one of my yahoo groups.  http://yourscrapboo kplace.blogspot. com/2013/ 03/april- fun-join- on-in.html  The Your Scrapbook Place site is having a contest using free digi stamps from Babycakes Doodle This and That.  Sitting here with a million and one things to do, I decided to head to my scraproom and make some cards.  hehehehehe.

My first card is using the For You Image. For You
This card is an A2.  I used Close to My Heart products.  As a Close to My Heart consultant, I try to use my products where I can.  The base card is cut from Cranberry cardstock 8 1/2 x 5/1/2 then folded in half.  I then cut two pieces of double sided Stella cardstock.  You know that info strip that most pattern paper has? Well, CTMH does this really neat thing and prints a pattern on one side of the info strip.  So, what looks like two pieces of pattern paper on the right side is only 1 piece using the pattern strip.  I then used CTMH watercolor pencils on the lines of image and used the CTMH blending brush to blend the colors to the center of the image.  The pattern paper and image was corner rounded and the image is pop-dotted.

My second card is using the Love Conquers All image.  Love Conquers All
Again, the card size is A2.  I used Seafoam green cardstock cut at 8 1/2 x 5/12 then folded in half.  I then cut a scrap piece of paper 4 x 5 1/4 and distressed the edges using the CTMH edge distresser. I then inked the distressed edges using Chocolate Ink.  I used some scrap SEI double sided paper and cut 8 pieces 1/2 x 2.  Using 4 pieces, I then folded each end.  I glued the folded ends together to form the zig zag pattern.  I used the other side of the pattern paper of the last 4 pieces and again folded each end and glued them together in the zig zag pattern.  The image itself was colored using CTMH watercolor pencils and blended using the CTMH waterbrush.  The image was distressed with the edge distresser and inked in Chocolate.  The image is pop-dotted.

My third card is using the Hanging Heart image.   Hanging Heart
I used Vanilla cardstock for the base card, cut at 8 1/2 x 5 1/2 and folded in half.  I then cut a scrap pattern paper 4 x 5 1/4 and glued in place, leaving 1/4 all around.  The banners were cut 2 x 3 and 2 1/4 x 4 1/2.  To make the banners, I fold the paper in half lengthwise and cut from the outside edge to the center so both sides of the banner are even.  The larger banner was glue even with the top of the card then the smaller banner was glued over the larger banner and again even with the top of the card.  The actual Hanging Heart image looked like the heart was hanging from a ribbon, but I cut that part off.  The image itself was colored with CTMH watercolor pencils and blended with the waterbrush.  The flower and purple heart buttons are CTMH.  The love button is from Dress It Up and the blue heart button I received in a swap. 

I'll let you all know if I win anything!!!!!

Friday, April 12, 2013

Sisterhood of the Traveling Scrapbookers

I live in a retirement community in Southern California.  There are lots of groups and I found myself gravitating to the Sisterhood of the Traveling Scrapbookers and Cardmakers...they really do all kinds of paper crafting...it's a great group...In January, one of the instructions decided to quit and I was asked to help lead the group of about 30 women.  We meet twice a month on the second and forth Thursday of the month.    In this session, I did a two-page scrapbook layout and a card.  Patty, my co-hort in crime, did two cards.


In my first layout, I used Taffy background cardstock from Close To My Heart.  I used the Art Philosophy Cricut cartridge and cut the Taffy gingham 11" dolly.  I then used a Martha Stewart punch and punch the top and bottom of Dots for You 3 x 9 paper.  The butterfly paper is 2 x 6.  I used the Art Philosophy Cricut cartridge and cut various sizes of circles from 3" to 3/4 " using 9 different pattern papers...some are attached with 1/8" and 1/4" pop dots.  Close to My Heart Lagoon paper was used for the picture mat and sentiment.  The end cap feature was used in the Plantin School Book cricut cartridge to cut the sentiment. I backed it in white and used 1/8" pop dots. All the pieces with distressed using Close to My Heart Chocolate Ink.


 I used all the same papers from the 1st layout to complete this second page.  Only the top circle is pop dotted and again, all pieces are distressed using Close to My Heart Chocolate Ink.  I hope you like these layouts.


Sunday, February 26, 2012

Let's Scrap Blog Around the World Day 14

This is the last day for me on the Let's Scrap Leap Around the World Blog Hop....here are the last 5 of the 50 cards I made this month.  Whew.  This was a lot of fun and I'm going to miss going on the site everyday.  So let's begin:
Card 46 is made with glitter and stickers.  On the flower sticker, you take off a section at a time and add the glitter from dark to light.  So, I took off all the sections of the dark green first...then glittered that...next the brown, etc.  You use double sided glue sheets and they are heavy duty so the glitter just shines.  This technique uses little glitter, but you will have it all over you for a couple of days and all over your craft room for weeks.  I just love this glitter and play with it as often as I can.
Card 47 uses the same vinyl stickers as card 46, but this time I didn't glitter it in.  I placed the sticker on a piece of acetate and filled in the back with alcohol ink.  The papers and ribbon are from my stash.
Card 48 uses scrap paper and a stamp from Outlines.  Take a moment to check them out.  I love their stamps and they are so original and clever in showing you how to use them...a lot of layering.  Here I colored the hearts and flowers with alcohol ink.  I made 3 stamps of the heart and layered it with pop dots.  I added liquid glass in the center of the flowers and liquid pearls all over the heart.
I make cards and send them to the troops through Mothers Cookies - a group of women that send out packages every single month.  These cards go to the troops for their use.  Something to write in and send home.  I used sizzix dies to cut the flower and pocket, a Close To My Heart stamp for the stitching and a wood stamp I had for the sentiment.  Stickles were used to add a little bling to the flowers.
My last card is a card I made for my mother.  I used the masking technique.  First I stamped the House Mouse onto the paper.  Then I covered it with another image of the same stamp and cut out.  Then I stamped the Close To My Heart band-aid all over the card...then filled in the spaces with another CTMH stamp.  I used water color pencils to color the mice and hearts.  I finished this card by using my black writer to write the words Get W....on the mouse's tail.

Wednesday, February 22, 2012

Let's Scrap Blog Around the World Day 13

Well I have been asked to go over step by step the use of alcohol inks so tomorrow I will be spending the day playing to come up with some good pictures.  Today, is all about the Let's Scrap Leap Around the World Blog and I have 5 more cards to post.
I turned sketch 41 on it's side and decided that the layering looked like steps so I made this three step card from a 5 1/4" x 10 1/2" piece of double sided cardstock.  I first scored 3/4" on each of the long sides then I turned my paper and scored at 2 5/8", 5 1/4", 7", 8 5/8" and 9 1/2". I took my x-acto knife and cut on the 3/4" scoreline from the 2 5/8" score to the 9 1/2" score line and did my valley and mountain folds.  The stamp and the sentiment are CTMH and the flowers are from Heartfelt Creations.  I stamped them in 3 colors to match my paper, cut them out and cupped the petals using my 8 mm McGill stylus.   Then I pop-dotted them to the steps of the card.  My flower lady was colored with copic markers to match the paper.
The hardest part about this sketch was the measurement of each piece.  I visualized this 6" x 6" card in quarters, then started with the 1" x 3" piece in the lower right hand side and worked from there.  I used all pink scraps.  One - the sketch was in pink and Two - pink is my favorite color.  After I figured out all the dimensions, I reduced them by 1/16" on each side so you could see the black.   The sentiment is another CTMH stamp.
Card 43 I made the day I was playing with my Ranger alcohol inks. This is caramel and latte on plain white cardstock.  It really uses a lot of ink.  The stamp and sentiment are mounted wood block stamps and I'm no longer sure where I got them.  The flourish is a sizzix die.  The bottle layer piece is pop-dotted.
This card uses Close To My Heart paper and stamps.  Well the girl and the hearts are CTMH.  The sentiment is a block stamp.  I used 3 heart eyelets to complete the simple detail.

I turned sketch 45 into a waterfall card.  You pull the ribbon at the bottom down and the scallops flip up and slide under the horizontal strip until you see the last sentiment.  This was fun to make.  Later this week, I will give you all the details and add some additional pictures so you can make this card yourself.   For basics, it is a 5 1/2" x 4 1/4" card.  I used my marvy scalloped punch and oval punch to make the 4 sentiments.  The CTMH ribbon is tied at the bottom and I used an extra circle to reinforce the paper.


Well I have 5 cards left before the end of the month.  It's been fun making so many cards and my house has suffered.  I'll be glad to get back to scrapbooking.

Monday, February 20, 2012

Let's Scrap Blog Around the World Day 12

This weekend was a busy one.  Saturday I spent the day cropping with friends.   Sunday we all went to the Riverside County Date Festival in Indio.  We had fun on all the rides and fair food is always good.  Well, I added 4 more cards for you to review.
In card 37 I used another one of my Penny Black stamps.  Mimi is sooo cute in her green outfit...like any girl, it's all about the shoes and Close to My Heart had the perfect stamp for shoes and sentiment.  The papers are DCWV.  Mimi's hat is 100 Black.  The reds are R24 and 27.  Her hair is YR21, E30, 33 and 35.  For her skin, I used E000, 00, 11 and R20.  Her dress is G00 and G02.  I penned the floor and her shadow is C1.  As always, coloring Mimi puts me in a happy mood.
Card 38 was another fun card to make because I got to play with my alcohol inks.  I used caramel with my blender ink on my stamp pad and just bounced my way around a piece of shinny cardstock.  Then stamped with one of my mounted stamps.  Thinking of You is another mounted stamp and the sentiment is raised with pop-dots.  The papers are all scraps.
Again, card 39 uses paper from my scrap bin.  The stamps are mounted.  I'm not sure where I got my mounted stamps....I bought them quite awhile ago.  I rounded the corners of the card to soften the edges and added 3 pearls as shown on the sketch.  I colored the leaves with copics YG11,17.
The sketch for card 40 used eyelets.  But, to tell you the truth, I forgot how to set eyelets in the middle of the page.  I've used my crop-a-dile for so long now and they can only be set so far in....  I used a CTMH stamp for the faux stitching and sentiment.  My stamp was longer than the area I needed to stamp, so I masked each side so the stamp would be just where I wanted it.  Instead of eyelets, I used buttons.  Most of them are black, but the center and 4 corners are navy blue.


Only 10 more cards to post and then I'm done.....whew 50 cards in 29 days....needless to say, I'll have my cards completed for the whole year.

Thursday, February 16, 2012

Let's Scrap Blog Around the World Day 11

Well another day another card...or should I say cards.  I was up late last night and early this morning making cards.  I'm really having a lot of fun following the blogs and making cards from the sketches.
This was a fun stamp to color.  I used scrap paper.  The Love stamp is from Oulines.  I love their stamps.  I used copic markers YG11, 17; V12, 15, 17 and R 81, 83 and 85.  I used liquid glass to color in the flower to make it shine.
When I was putting my scraps on my card it looked like a layer cake so I made it a cake and added the appropriate stamp.  The stamp is CTMH.
Card 33 uses CTMH papers and some scraps from K & Co.  I used a circle cutter and pop-dotted the butterfly.

Card 34 uses the same CTMH papers as 33.  This is just layering all the different papers.  The center post card paper is from my scraps.
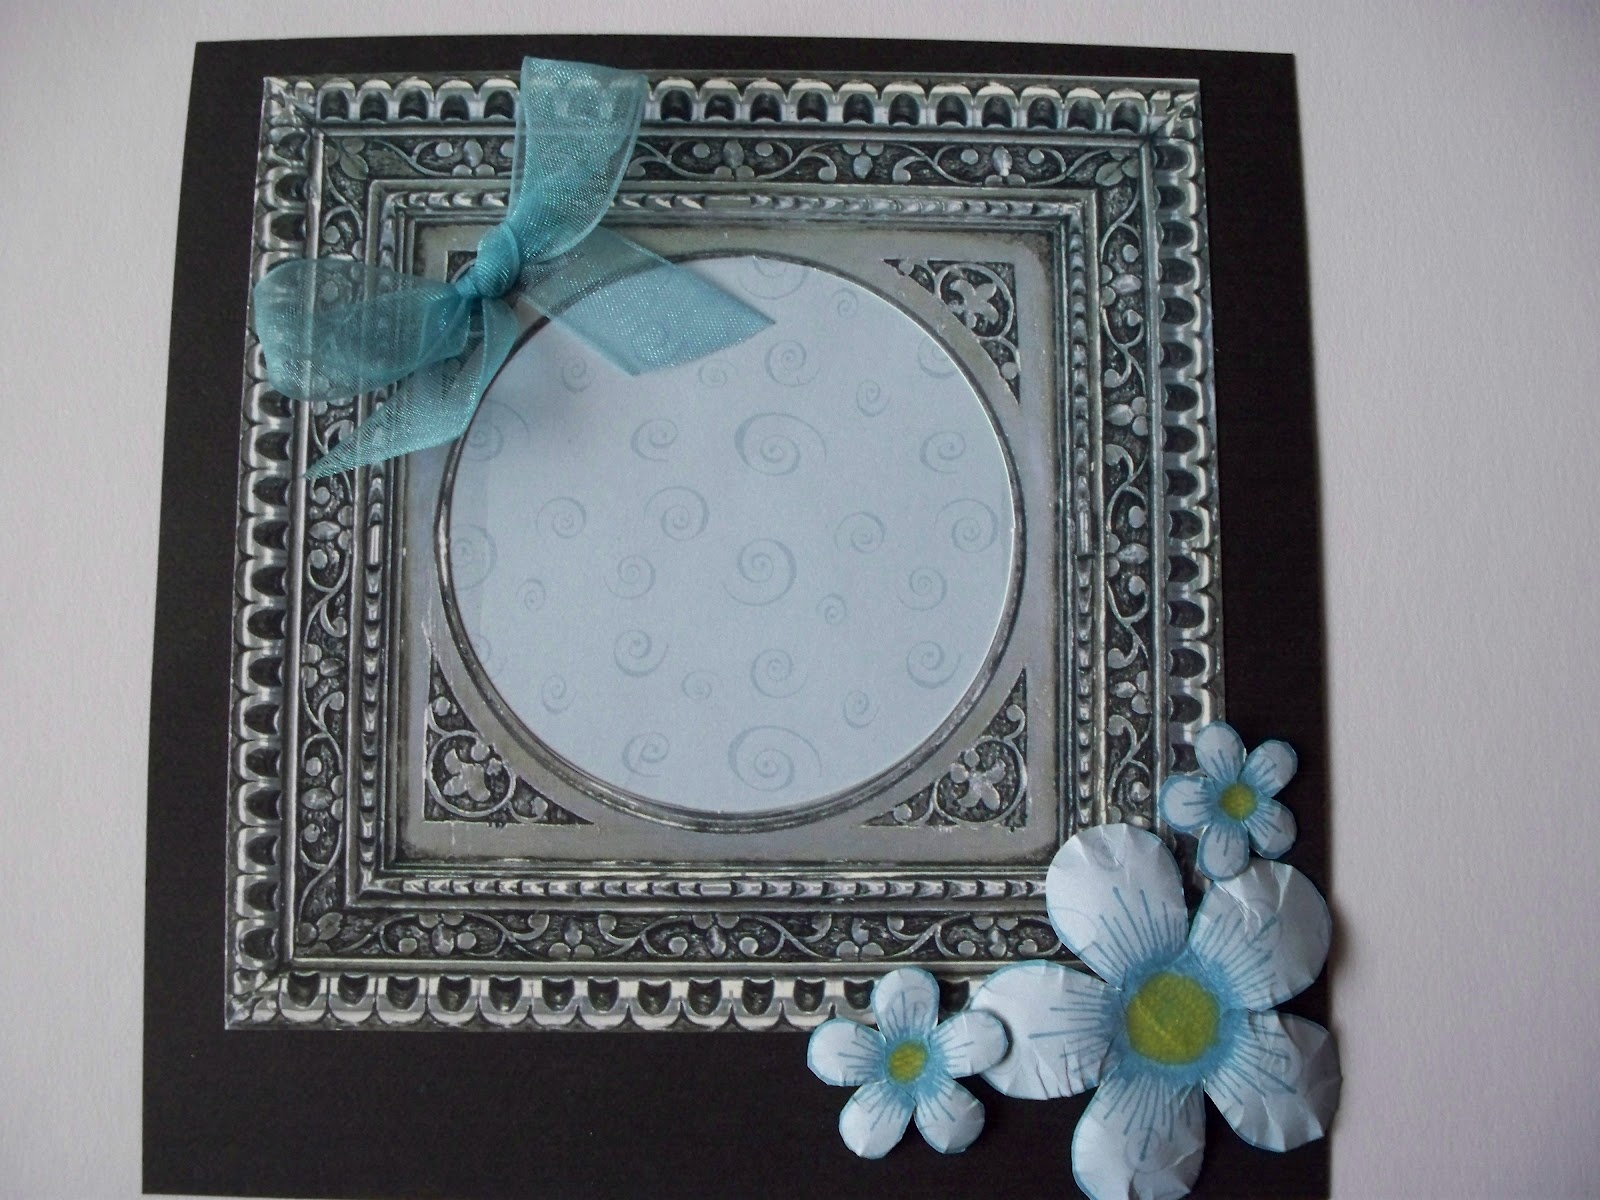
I bought this frame set from QVC a few years ago.  They were supposed to be for my scrapbook, but I found them to be to ornate. I think they work perfectly for cards.  The ribbon is CTMH and I made the flowers using a stamp set from Heartfelt Creations.  If you have some time, please visit their site.  They have wonderful stamps and dies to match.  After I stamped the image, I cut them out and used my McGill 8mm stylus to cup the petals.
The last card today is for my grand daughters birthday.  I used the CTMH Art Philosophy Cricut cartridge to cut the banner and my circle cutter to cut the circles.  I found the tag in my stash of Tag-lets (also from QVC many moons ago).  The Happy Birthday is a rub on and the '10' is a sticker.  I love these happy colors and I think she will too.